How to Make a Social Media Calendar for Consistent Posting

Let’s face it – keeping your social media pages active can feel like a full-time job. From brainstorming ideas and creating content to figuring out the right time to post, it’s easy to get overwhelmed. That’s where a social media calendar steps in. If you’ve been wondering how to make a social media calendar that actually helps you stay on track, you’re in the right place.
In this blog, we’ll break it down step-by-step – no fluff, just useful stuff. Whether you’re a small business, a startup or working with a top social media agency in Dubai, this guide will help you keep your content game strong and your audience engaged.
Why You Need a Social Media Calendar
Think of your social media calendar as your content compass. Without it, you’re just posting on the fly – and that’s a recipe for inconsistency, burnout, and missed opportunities. But with a good calendar in place:
- You stay organised
- You maintain a consistent voice
- You create time for quality over quantity
- You align your content with important dates, promotions, and campaigns
In short, it helps you work smarter, not harder.
Step 1: Know Your Platforms
Before you even start filling out a calendar, take stock of where you’re active. Are you focusing on Instagram and TikTok? Or maybe you’re more into LinkedIn and Facebook? Each platform has its own vibe and audience.
A social media agency in Dubai will usually customise strategies per platform – and so should you. For example, Instagram might be great for visual content, while LinkedIn is better suited for thought leadership posts.
Step 2: Identify Your Content Pillars
Content pillars are the main themes or categories your brand talks about regularly. For example, if you’re a fitness brand, your pillars might be:
- Workout tips
- Nutrition advice
- Client success stories
- Behind-the-scenes content
- Promotions and offers
These pillars make it easier to plan and maintain a healthy content mix – and they help avoid sounding repetitive.
Step 3: Choose Your Posting Frequency
Quality beats quantity, always. Don’t feel pressured to post every day on every platform. Be realistic about your bandwidth.
Here’s a good rule of thumb:
- Instagram: 3–4 times a week
- LinkedIn: 2–3 times a week
- TikTok: 3–5 times a week
- Facebook: 2–4 times a week
- Twitter/X: Daily if possible
Pick what works for you and build consistency around it. Once your rhythm is set, you can slowly scale up.
Step 4: Create the Calendar Framework
Now for the fun part – building your actual calendar.
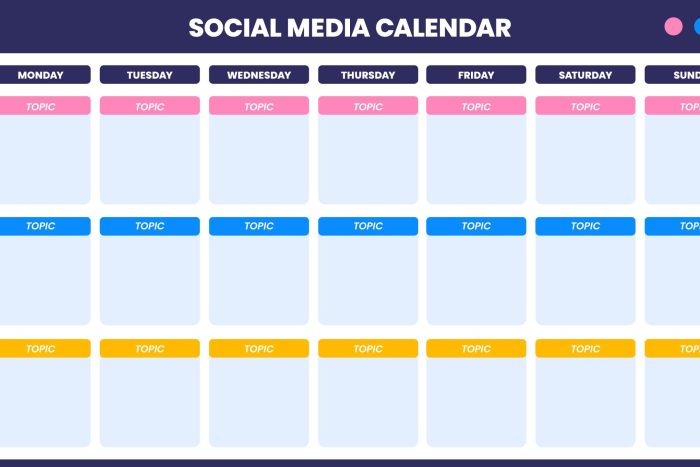
You can use a simple spreadsheet to start. Create columns like:
- Date
- Platform
- Content Pillar
- Caption/Copy
- Image/Video
- Hashtags
- Status (To Do / Scheduled / Posted)
Or, if you want something a bit fancier, tools like Notion, Trello, or Google Calendar work great. For more robust planning, platforms like Later, Hootsuite or Buffer can even help you schedule social media posts directly.
Step 5: Mix Your Content Types
Not every post needs to be a sales pitch. A good social media calendar includes a mix of content types:
- Educational posts – Tips, how-tos, or “did you know” facts
- Entertaining posts – Memes, fun facts, trends
- Promotional posts – Product launches, discounts, announcements
- Engaging posts – Polls, questions, user-generated content
- Behind-the-scenes – Company culture, work-in-progress content
The goal? Keep your audience interested and your feed fresh.
Step 6: Align with Key Dates and Campaigns
Don’t forget to look at the bigger picture. Think seasonal campaigns, holidays, product launches, or industry-specific events. Whether it’s Ramadan in the UAE or Black Friday sales, these dates can guide your content themes.
Also, plan posts around internal campaigns or team activities. Launching a new service? Hosting a webinar? Planning a photoshoot? Block these into your calendar so you’re always prepared.
Step 7: Write and Batch Your Content
Now that your calendar’s in place, it’s time to fill in the blanks. Don’t wait till the day of to write your captions. Instead, batch your content – write a week (or even a month) of posts in one go.
This makes sure your tone stays consistent, your messaging stays on-brand, and you avoid last-minute panic posting.
Pro tip: Keep a bank of evergreen content ready. These are posts that aren’t time-sensitive and can fill any gaps when you’re short on ideas.
Step 8: Use Tools to Stay Ahead
Once your posts are ready, it’s time to schedule them. As mentioned earlier, tools like Later, Buffer, Hootsuite, and Sprout Social make this easy. They not only let you schedule in advance but also give you insights on what’s working (and what’s not).
If you’re already using an SEO content calendar, this is the perfect opportunity to align your blog, newsletter, and social posts – creating a seamless marketing ecosystem.
Step 9: Track, Learn, Optimise
Your calendar isn’t a one-time project. It’s a living document. Review performance every week or month:
- Which posts got the most engagement?
- Which ones flopped?
- What time did your audience engage the most?
- Which hashtags brought the most reach?
Learn from this and tweak your calendar accordingly. The more you adapt based on data, the more effective your strategy becomes.
Final Thoughts
Creating a social media calendar doesn’t need to be complicated. It’s just about getting organised and staying intentional with your content. Whether you’re a solo content creator or working with a professional social media agency , having a well-planned calendar helps you stay visible, consistent, and connected with your audience.
So next time you’re staring at a blank Instagram draft, remember – with a solid plan in place, you’ll never run out of things to say.
Let your content work for you, not against you.

